
Garage Door Maintenance Checklist: The 15-Minute Routine That Saves You Hundreds
Your garage door is the largest moving component in your home. It cycles open and closed roughly 1,500 times per year, lifting and lowering hundreds of pounds of steel, wood, or aluminum with every use. Despite this workload, most homeowners never give their garage door a single minute of maintenance attention — until something breaks.
The irony is that garage door maintenance is one of the simplest and most cost-effective things a homeowner can do. A 15-minute routine performed four times a year can extend the life of your springs by years, prevent most roller and track failures, keep your opener running smoothly, and dramatically reduce the chance of an emergency breakdown that leaves you stuck at the worst possible time.
This checklist covers everything you need to do, in the right order, with no special tools required. Whether you're in San Jose, Los Gatos, or Redwood City, this routine applies to virtually every residential garage door system.
Step 1 — Visual Inspection (3 Minutes)
Start with your eyes. Stand inside the garage with the door closed and look at the entire system — both sides, top to bottom.
Look at the springs above the door opening. Are there any visible gaps in the coils, signs of rust, or black residue on the floor beneath the spring? A gap means the spring has broken or is separating. Rust weakens the metal and accelerates fatigue. Black residue is metal dust from the coils grinding, which indicates the spring is nearing the end of its life.
Check the cables running from the bottom brackets up to the cable drums. Look for fraying — individual wire strands separating from the cable body. Check that the cables are taut and sitting properly in the drum grooves. Slack cables or cables that appear to have shifted on the drum need professional attention.
Inspect the rollers in the tracks. Look for cracked or chipped wheels, wobbling stems, and flat spots. Open the door halfway and feel each roller for roughness or binding when rotated by hand. Rollers that don't spin freely need replacement.
Examine the hinges connecting each panel. Look for cracks, elongated pivot holes, or rust. Hinges with play in the pivot allow panels to shift during travel, which creates noise and accelerates wear on other components.
Look at the bottom section of the door for dents, cracks, or separation at the joints. The bottom panel takes the most mechanical stress and is the most common section to need replacement.
Finally, check the weatherstripping — bottom seal, side seals, and top seal. Look for cracking, peeling, gaps, or sections that have pulled away from the door or frame. Damaged weatherstripping allows water, dust, insects, and cold air into the garage.
Step 2 — Lubrication (5 Minutes)
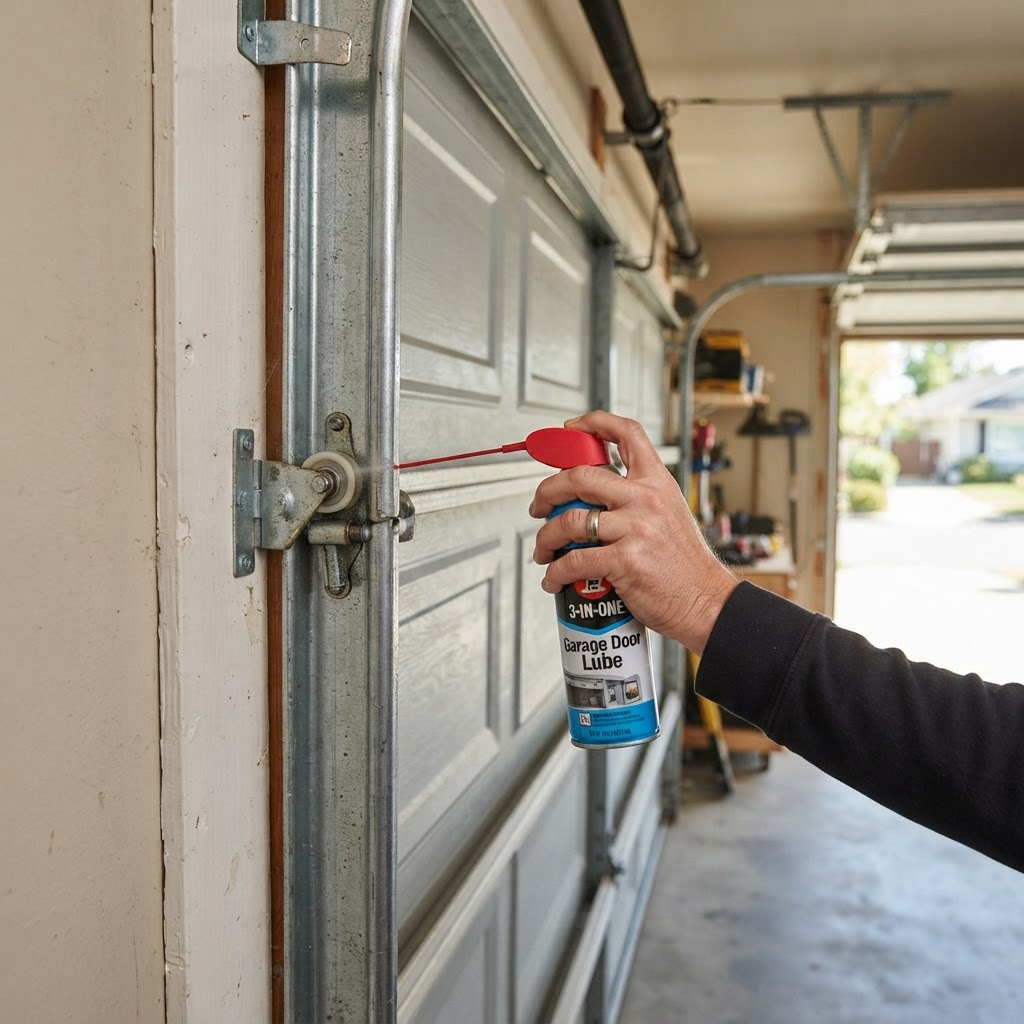
Lubrication is the single highest-impact maintenance task you can perform. Proper lubrication reduces friction, prevents rust, extends component life, and dramatically reduces operating noise.
Use a garage door-specific lubricant — either a silicone-based spray or a white lithium grease. Do not use WD-40, which is a solvent and degreaser, not a lubricant. It will strip existing lubrication and provide only temporary noise reduction before the problem returns worse than before.
Apply lubricant to the torsion springs along the entire length of the coils. Spray in a slow, even pass, allowing the lubricant to penetrate between the coils. This reduces the metal-on-metal friction that occurs during winding and unwinding and is one of the most effective ways to extend spring life.
Lubricate each roller at the point where the wheel meets the stem, rotating the roller to distribute the lubricant into the bearing. For steel rollers with open bearings, this is especially important. Sealed nylon rollers require less lubrication but still benefit from it.
Spray each hinge at the pivot point. Hinges are high-friction components that benefit significantly from regular lubrication.
Apply a light coating of lubricant to the track surface — not heavy enough to drip, but enough to reduce friction as the rollers travel through. Focus on the curved section of the track where the directional change creates the most roller-to-track contact.
If you have a chain-drive opener, apply lubricant to the chain along its full length. If you have a screw-drive opener, lubricate the drive screw. Belt-drive openers do not require lubrication of the belt.
The American Society of Home Inspectors recommends garage door lubrication as part of their standard homeowner maintenance guidelines — it's that universally recognized as essential.
Step 3 — Hardware Tightening (3 Minutes)
Vibration from daily operation gradually loosens the nuts, bolts, and screws throughout your garage door system. A socket wrench and a screwdriver are all you need.
Tighten the bolts on the track mounting brackets — the brackets that attach the vertical tracks to the door frame and the horizontal tracks to the ceiling supports. Loose brackets allow the tracks to shift, which causes binding, noise, and eventual roller derailment.
Check and tighten the hinge bolts that attach the hinges to the door panels. Loose hinge bolts allow the panels to shift relative to each other during travel.
Tighten the bolts on the opener bracket — the bracket that attaches the opener rail to the wall or header above the door. A loose opener bracket creates vibration and noise that transfers into the structure of your home.
Check the bolts on the spring hardware — the center bearing plate, the end bearing plates, and the cable drum set screws. Do not attempt to adjust the spring tension or the winding cone — those require professional tools and training. You're simply checking that the mounting hardware is snug.
Step 4 — Balance Test (2 Minutes)
The balance test is the most important diagnostic check you can perform, and it takes less than two minutes.
Pull the emergency release cord to disconnect the opener from the door. Manually lift the door to about waist height — roughly halfway up — and let go. Watch what happens.
A properly balanced door will hover in place with minimal drift. A slight drift of a few inches in either direction is normal. But if the door sinks to the floor, rises to the top, or drifts more than a foot in either direction, the springs are out of balance and need professional adjustment.
An out-of-balance door forces the opener to work harder on every cycle, which accelerates wear on the opener's gears, motor, and drive system. It also puts uneven stress on the cables and drums. Getting the balance corrected — which is a professional adjustment, not a DIY task — protects every other component in the system.
After the test, pull the emergency release cord toward the motor to re-engage the trolley, then press the wall button or remote to reconnect. Our guide on warning signs your garage door needs repair explains what an imbalanced door indicates about your spring health.
Step 5 — Safety Sensor Test (1 Minute)
Test your auto-reverse safety sensors every time you do maintenance. Open the door fully, then press the close button. While the door is closing, place an object — a box, a broom, or a 2x4 laid flat — in the door's path, breaking the sensor beam. The door should immediately stop and reverse.
If the door continues closing and contacts the object, the sensors are misaligned, dirty, or malfunctioning. Do not use the door until the sensors are working correctly — this is a critical safety feature, especially in homes with children and pets.
Also test the mechanical auto-reverse by placing a 2x4 flat on the floor in the center of the door's path. Close the door onto it. The door should reverse within two seconds of contacting the board. If it doesn't, the opener's close-force settings need adjustment — a task covered in your opener's manual or by a professional during a tune-up.
Step 6 — Door and Opener Observation (1 Minute)
Run the door through two or three complete open-close cycles while watching and listening. Stand to the side — never under a moving door — and observe.
Watch for smooth, even travel. The door should move without hesitation, jerking, or tilting. Listen for new or unusual sounds — grinding, scraping, squealing, or popping that wasn't present during your last maintenance session. Our detailed garage door noise diagnosis guide maps each sound to its likely cause.
Watch the door seal against the floor when closed. It should sit flat and even across the full width, with the bottom seal compressed evenly. Gaps indicate floor unevenness, a warped bottom section, or a track alignment issue.
Observe the opener's operation. Does the motor start promptly when you press the button? Does it run smoothly without straining? Does the light function correctly?
Seasonal Considerations for Silicon Valley
While this checklist applies year-round, certain seasonal factors in the Bay Area deserve extra attention.
Before the winter rainy season — typically October through November — pay special attention to weatherstripping and bottom seals. Replace any seals that are cracked, dried out, or no longer making full contact with the floor. Also clean the garage floor along the threshold to ensure proper seal contact.
During spring, check for pest activity. Spiders build webs across safety sensors, rodents chew through sensor wiring, and insects nest in track channels and roller bearings. A quick cleanup removes these issues before they cause operational problems.
In summer, lubrication is especially important because higher temperatures can cause existing lubricant to thin and migrate, leaving components unprotected. A summer lubrication pass ensures adequate coverage through the warm months.
When Maintenance Isn't Enough
This quarterly checklist handles the preventive side of garage door care. But there are things that only a professional should do: spring tension adjustment, cable replacement, track realignment, opener motor servicing, and any work involving the winding cone or bearing plates.
For homeowners in Campbell, Saratoga, Santa Clara, and across Silicon Valley, we recommend a professional tune-up once a year in addition to your quarterly DIY maintenance. A professional visit covers everything on this checklist plus the items that require specialized tools, calibration, and expertise.
If your door is telling you it needs more than maintenance — through the broken spring warning signs or the persistent issues described in this guide — schedule a garage door repair visit. Catching problems during maintenance is the whole point of doing maintenance, and acting on what you find is what makes the routine worthwhile.
Fifteen minutes, four times a year. That's one hour of total attention annually, to protect a system that serves your household thousands of times per year. It's one of the best investments of your time as a homeowner.
Want a professional tune-up?
Pair your quarterly DIY routine with an annual professional tune-up. We inspect, lubricate, balance, and calibrate every component — catching the problems that need specialized tools before they turn into emergency breakdowns.
Book annual maintenance