
Garage Door Won't Close All the Way — Every Cause and How We Fix It
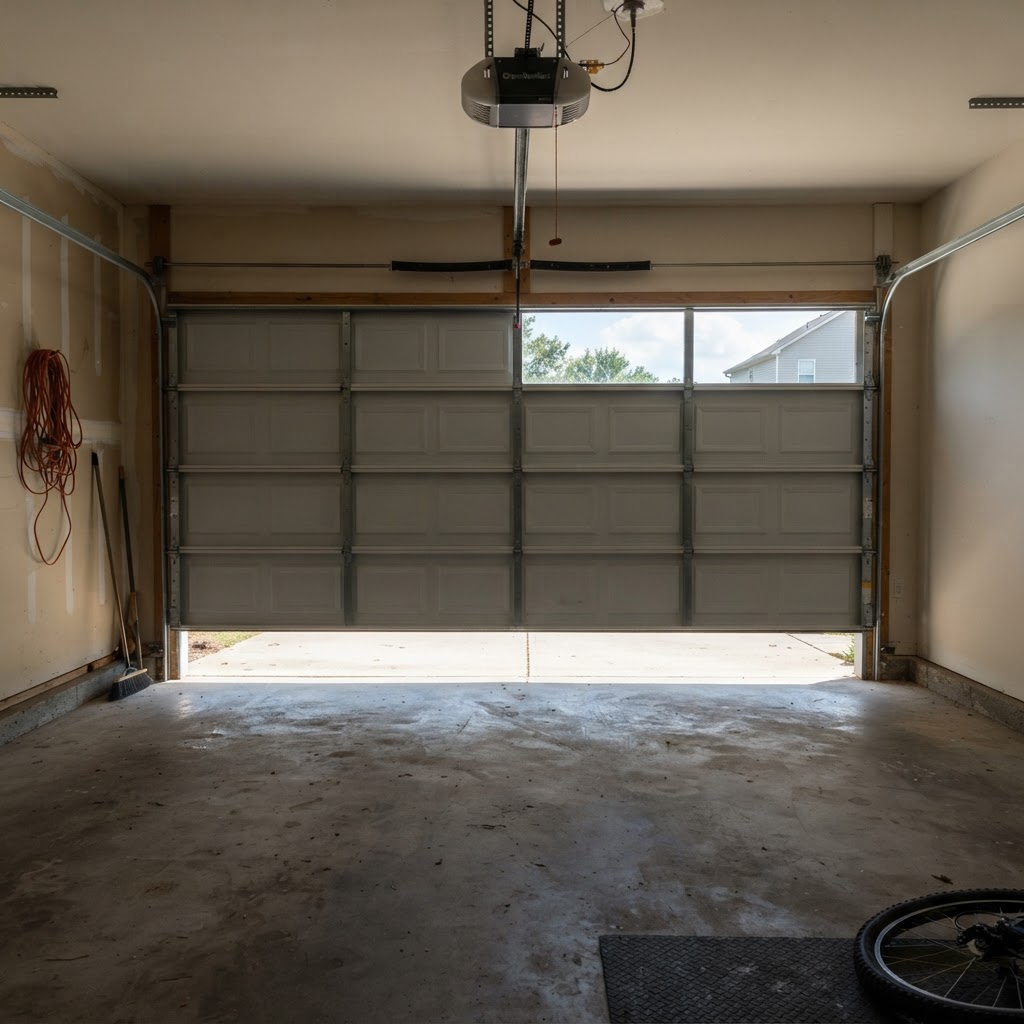
Your garage door goes most of the way down, and then it stops. Maybe it leaves a two-inch gap between the bottom of the door and the floor. Maybe it's six inches. Maybe it makes it within a fraction of the floor but then bounces back up an inch, leaving a sliver of daylight along the bottom edge that you can see from the driveway. Or maybe it closes completely on one side but leaves a visible gap on the other — a wedge of light that tells you the seal isn't making contact.
However it manifests, the result is the same: your garage door isn't fully closed, and your garage — the largest opening in your home — is exposed. Rain can get in. Cold air can get in. Dust, leaves, and debris can get in. Insects can get in. Rodents can get in. And most concerning of all, the visual signal of a door that doesn't close all the way tells anyone passing by that the garage is accessible — a security vulnerability that no homeowner in San Jose, Campbell, or anywhere in Silicon Valley should leave unresolved.
The good news is that a door that won't close fully almost always has an identifiable, fixable cause. Here are the six most common, ordered from most likely to least likely, with the diagnostic details and fixes for each.
Cause 1 — Safety Sensor Misalignment or Obstruction
This is the single most common reason a garage door won't close all the way, and it accounts for the majority of "door won't close" service calls we receive across Silicon Valley.
Your garage door opener has two safety sensors mounted at the bottom of the door tracks — one on each side of the opening, about six inches above the floor. One sensor emits an invisible infrared beam, and the other receives it. When the beam is unbroken, the opener allows the door to close. When anything interrupts the beam — a person, a pet, a bicycle, even a cobweb — the opener stops the door or reverses it as a safety precaution.
When the sensors are misaligned, dirty, or have damaged wiring, the opener interprets the weak or absent beam as a permanent obstruction and refuses to complete the closing cycle. The door starts down, the sensors fail to confirm a clear path, and the door either stops partway or reverses back up.
What you'll notice: The opener light typically blinks a specific number of times after the failed close attempt — this blink pattern indicates a sensor issue on most LiftMaster, Chamberlain, and Genie models. You may also see that the LED on one or both sensors is flickering rather than steady, or off entirely.
Our detailed safety sensor troubleshooting guide walks through every sensor diagnostic and fix — from cleaning the lenses to realigning the brackets to checking for rodent-chewed wiring. If your opener light is blinking after the failed close, start there.
Cause 2 — Close-Limit Switch Set Too Short
If the door travels most of the way down — coming within a few inches of the floor — and then stops without reversing, the close-limit switch is the most likely culprit. This is a setting on the opener, not a physical obstruction, and it's one of the easiest things to adjust.
The close-limit switch tells the opener's motor exactly how far the door should travel before the motor shuts off. If the setting is too short — meaning the motor is programmed to stop before the door reaches the floor — the door will consistently stop at the same height every time, leaving a gap that's always the same size.
This can happen when the opener is first installed and the limits aren't perfectly calibrated, when someone adjusts the limits without realizing the downstream effect, or when the opener's settings drift slightly over time due to vibration or temperature changes.
The fix: On most modern openers, the close-limit adjustment is a small dial or screw on the side or back of the motor unit, typically labeled "Down," "Close," or "Close Limit." Turning the dial in small increments — usually a quarter turn at a time — increases the distance the door travels downward before the motor stops. After each adjustment, test the door through a full close cycle. The goal is to have the door reach the floor with the bottom seal slightly compressed against the concrete, then stop. If the door hits the floor and then reverses, you've over-adjusted — back the limit off slightly. The opener is interpreting the continued motor resistance after the door reaches the floor as an obstruction and triggering its auto-reverse.
This is one of the few adjustments most homeowners can safely make themselves. But if adjusting the limit doesn't resolve the gap, or if the door behaves differently each time, there's likely a secondary cause at work.
Cause 3 — Close-Force Setting Too Low
Related to but distinct from the limit switch, the close-force setting controls how much motor force the opener applies during the closing cycle. If this setting is too low, the opener gives up too easily — any minor resistance from normal track friction, slightly stiff rollers, or a door that's marginally out of balance triggers the motor to stop short, interpreting routine operational resistance as an obstruction.
The close-force adjustment is typically a separate dial from the limit adjustment, labeled "Force" or "Down Force." Increasing it in small increments gives the motor permission to push through normal operating resistance without triggering a stop or reversal.
An important caution: don't simply crank the force setting to maximum. The auto-reverse and auto-stop features exist to protect people, pets, and property. If the door is stopping because it's genuinely encountering abnormal resistance — from a binding track, a damaged roller, or a failing spring — increasing the force doesn't fix the root cause. It forces the door through a problem that should be diagnosed and repaired. Increase the force in small increments, test after each adjustment, and if the door still won't close properly at a moderate force setting, there's a mechanical issue that needs professional attention.
Cause 4 — Track Misalignment or Physical Obstruction
If the door consistently stops at the same height — not near the floor, but at a specific point during its downward travel — there's likely a physical restriction in the track at that location.
Walk to the tracks on both sides of the door and inspect them at the height where the door stops. Look for a dent or bend in the track channel, debris lodged inside the track (a small stone, a bolt, a piece of hardened grease), a roller that's damaged or binding at that specific point, or a track bracket that's shifted and created a pinch point.
A bent track creates a narrowing in the channel where the roller meets significantly more resistance. The roller either can't pass through the restriction at all — in which case the door stops dead — or it passes through with enough resistance to trigger the opener's force protection. Either way, the result is a door that consistently stops at the same height.
Track straightening and roller replacement at the binding point require professional tools and expertise — bending track back into alignment while the door's weight is in the system is not a DIY task. But identifying the point of restriction is something you can do visually, and it gives the technician a head start when they arrive. Homeowners in Santa Clara and Fremont frequently find debris is the culprit once they know where to look.
Cause 5 — Worn Bottom Seal Creating Visible Gap
This cause is different from the others because the door is actually closing all the way — mechanically, it's reaching the floor and the motor is stopping where it should. But the bottom seal — the flexible rubber or vinyl strip along the bottom edge of the door — has deteriorated to the point where it no longer creates a weather-tight contact with the floor.
A new bottom seal is soft, flexible, and compresses evenly against the concrete when the door closes, creating a barrier that keeps out water, wind, dust, insects, and light. Over time, the seal hardens from UV exposure, cracks from repeated compression, tears from scraping against concrete, or develops flat spots where it no longer bounces back to its original shape. The result is visible gaps — particularly noticeable as daylight along the bottom edge — even though the door itself is in its fully closed position.
This is especially common in garages where the concrete floor isn't perfectly flat. Older homes in Willow Glen, Almaden Valley, Cambrian Park, and other established San Jose neighborhoods often have garage floors that have settled or heaved unevenly over decades. A deteriorated seal that could still manage a flat floor can't bridge the dips and bumps of an uneven one.
The fix is straightforward and affordable: replace the bottom seal with a new one. Most seals slide into a retainer channel on the bottom panel — the old seal pulls out and the new one slides in. Cost for a professional bottom seal replacement in Silicon Valley is typically $75 to $150 including the seal and labor. For floors that are significantly uneven, adding a threshold seal — a rubber strip adhered to the floor along the door's closing line — creates a double barrier that compensates for floor irregularities.
Cause 6 — Spring Imbalance
If the springs are providing too much upward force — either because they're over-wound or because they were originally specified for a heavier door that has since been replaced with a lighter one — the door actively resists closing. The spring tension fights the closing motion, and the opener may not have enough downward force to push the door fully to the floor against the springs pushing back up.
You can check this with a manual balance test. Disconnect the opener by pulling the emergency release cord, then slowly lower the door by hand to the fully closed position. If the door feels like it's pushing back against you — wanting to rise rather than settle to the floor — the springs are providing too much counterbalance force. The door may hover a few inches above the floor or drift upward when released.
Spring tension adjustment is a professional service — not a DIY task. The technician releases or adds tension in controlled increments until the door balances at the halfway point, neither rising nor falling when released. Once the springs are properly calibrated, the opener will be able to close the door fully without fighting against excessive upward force.
The Security Angle — Why This Matters Beyond Weather
A garage door that doesn't close fully isn't just an inconvenience or a weather-sealing issue — it's a security exposure. An open gap at the bottom of the door is visible from the street, and it communicates to anyone passing by that the garage isn't secured. In neighborhoods across Berryessa, Evergreen, Mountain View, and the rest of Silicon Valley, where garages often contain valuable items — tools, bicycles, sports equipment, electronics, and in many cases access to the home's interior through the garage entry door — a gap that invites intrusion is a gap worth closing.
If your door won't close all the way and the issue has been recurring or worsening, our guide on why garage doors reverse when closing covers additional diagnostic scenarios that overlap with the causes described here.
For any cause that requires professional diagnosis — track alignment, spring adjustment, opener calibration, or persistent sensor issues that DIY fixes haven't resolved — call for professional service. Our technicians will identify the root cause, explain your options, and get your door closing fully and sealing properly — usually in a single visit.
Whether you're in Palo Alto, Fremont, Santa Clara, or anywhere we serve, a door that won't close all the way is a problem we take seriously — because your security and your comfort depend on a door that seals completely, every single time.
Gaps in your door are a security risk — get it fixed today
A door that won't seal completely leaves your home exposed. We'll diagnose the exact cause — sensor, limit, track, seal, or spring — and get your door closing fully, usually in a single visit.
Request your free assessment